UPLOAD HELP PAGE
Perfectsend™ is a preflighting program designed to check custom artwork for errors in EPS, PDF, TIF and PS (Postscript) files. It looks for problems that will prevent your spot or full color order from printing correctly.
Upload Process :
Uploading files is easy. From the main menu, click the button "Upload complete Design" or "Perfectsend":
Once you have filled out the Customer Order Form, simply click the Next button to be taken to the Shopping Cart page. You will see a listing similar to one shown here:
The message No File Uploaded alerts you to upload a file. Click the Upload File(s) button and you will presented with this menu:
Then navigate to the PDF, EPS, TIF, JPG or PS file on your computer that you intend to upload, and select it. When you are returned to the upload area, click:
and you are finished with the upload process. If you have a two- sided card, you will need to upload the back of the card also if it is not included in the same file.
File Checking/Preflighting:
Upon completion of the upload process, the program will check for missing fonts, low resolution images, etc. and you will be redirected back to the Shopping Cart page. Processing may take from one to several minutes, depending on the size of the file and number of jobs in the processing queue.
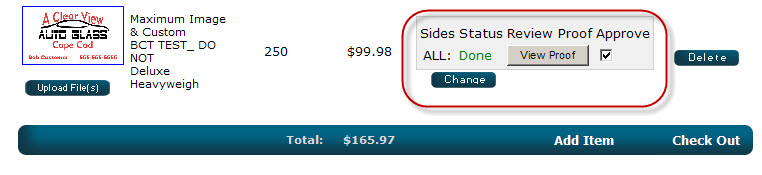
When this check is complete, you will see something like this:
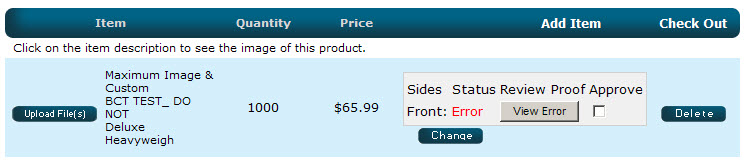
If the file fails the upload process, you will see something like this:
Click the
button for a detailed report of the problem. Below is a sample of the most common error, a low resolution file:

As mentioned in the production tips section that follows, all bitmap/raster images should be saved at a minimum of 300 dpi. This ensures maximum printing quality on a printing press. In the above example, the uploaded file had 71.99 (72) dpi images embedded in it.
Other common issues are missing fonts, password protected files, and corrupt files. Please fix these issues and re-upload the file.
General Production Tips :
While we accept PDF, TIF, EPS, JPG & PS (Postscript) formats, we recommend creating PDF files using the X-1a standard. For PDF info click here.
Regardless of the type of file you upload, here are some tips to help you succeed:
Choose Proper Spot Colors: Do not use RGB or CMYK colors for spot color jobs.
Images: All images should be at least 300dpi at the final image size. Stretching small images in a page layout program will only lower the resolution. A low resolution file will produce a jagged, blurry appearance when printed, and is usually rejected by the customer.
Fonts: Embed all fonts or convert them to outlines.
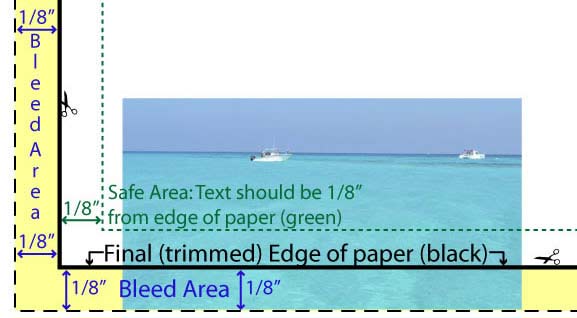
Bleeds & Safe Area: Add bleed of at least 1/8” (.125"/3.175mm) to files that need to print to the edge of the paper. Adding bleed to a file ensures that you don't get a small white "stripe" on the edge where you want a solid color.
In the example below, the yellow shaded area is the bleed area. This area (including the bottom of the photograph) will be trimmed off after printing.
Also, make sure that text boxes and non-bleeding graphic elements are at least 1/8" in from the final (trimmed) edge. This is called the "safe area."
The green dotted lines represents the "safe area"- 1/8" in from the trim edge. Due to the nature of the print production process, slight irregularities may vary the accuracy of the trimmed edge. Therefore, placing important design elements so that they do not fall in this 1/8" margin guarantees that they will not be trimmed out.
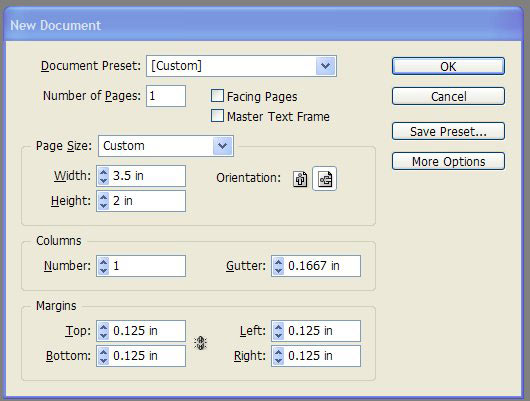
Page Sizes: Use a proper page size in page layout programs. In other words, don’t compose a single 3.5” x 2” business card in the middle of an 8.5” x 11” page- use a 3.5”x 2” page, as in the example below from InDesign:
Software: Using a true page layout program like Adobe InDesign® will make creating press-ready files easier and more efficient.
Templates:
For your convenience we have created a set of templates for our most common products.
Click on the link below for a zip file of templates for your design software:
PDF remains the file format of choice for professionals in the graphic arts industry. Today, creating PDF files is easier than ever before. Businesses that create PDF files for production on a regular basis will want to invest in Adobe Acrobat (which includes Distiller.) This allows the flexibility of printing from any program (even non-design programs like MS Office) to a virtual printer in your "Printers & Faxes" folder. It also has many production features not available in Adobe Reader.
Adobe also offers a stripped-down, online version of its Acrobat software for a monthly fee. By signing up online, users can create PDF files by uploading them to the site or printing to a virtual printer on the desktop- and the first five files are free. You may access this feature by choosing File > Create Adobe PDF Online in Adobe Reader.
You may download a free copy of Adobe Reader here:Creating PDF files with Acrobat/Distiller installed:
When you install Acrobat, a printer named "Adobe PDF" will be installed in your printers menu. Always choose this option when creating a PDF file, rather than "Save As..." The advantage is that it forces the file to print through Adobe Distiller.
Depending upon your operating system and application, you may see "Options," "Printing Preferences," or something similar in the print dialog box. Choose it, and select the "PDF/ X-1a:2001" option. The below example is from Adobe InDesign:
This option is available in Acrobat 6 and higher. The X-1a standard creates a compact PDF file that includes fonts, images, and spot color definitions. It also processes through the greatest number of platesetters and raster image processors (RIPs). If the X-1a option is not available, use [Press Quality] but be sure to embed fonts, flatten transparencies, and include high resolution images.
DO NOT use [High Quality Print] or [Smallest File Size] in the options menu. These were intended for proofing on an inkjet printer and viewing over the internet, respectively.Note: Avoid using free PDF making software off the internet. They often produce inferior files that do not adhere to the Adobe standards. With Adobe Acrobat (the full version with Distiller) you can make robust PDF files out of any software- including programs like Microsoft Word, Publisher, Corel, PaintShop, etc.
Click the link below for a printable PDF guide on creating PDF X-1a files:
Guide to Creating Production-Ready PDF Files
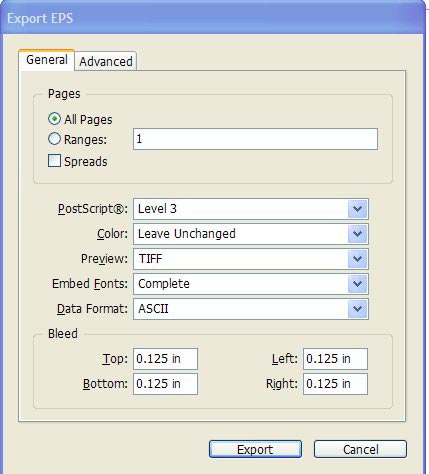
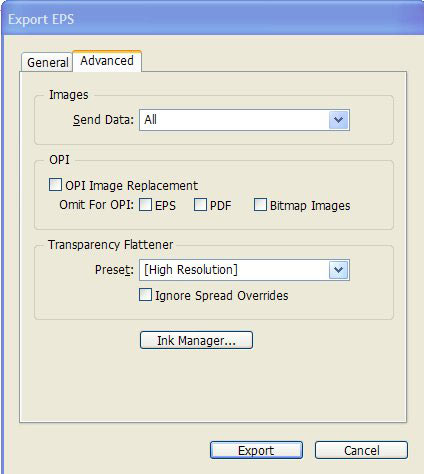
EPS FILES:
If exporting EPS files out of programs like Illustrator, Photoshop, etc., use the menus below as a guide.
Always embed fonts, choose ASCII data format, and choose [High Resolution] for the transparency flattener (may not be available in some programs.)
For additional assistance, please contact your local BCT representative.